Make Core One Great Again
5 minute read
Making Prusa Core One great (and silent) again
- For fixing loudness on printing
- For fixing printing issues
Tuning and calibration using firmware >= 6.4.0-alpha
Belt tuning
-
If the printer is turned on, first disable the motors using
Control->Disable motorsin order not to break the hw board due to voltage overload - Move the extruder to the center and the gantry to the back
- Start with loosening the belt completely
- Move the gantry to the front and let it bump to the front by moving forward and backward
- Make sure that the gantry is hitting both sides equally by listening
- If not, gently try to square the gantry by using a tool on the side that hits the front first and pull the gantry gently on the other side until the gantry is hitting both sides equally
- Tighten the belt tensioning screws equally (either use an allen key for that or a screwdriver with a marked side) until the belt are not loose anymore but slightly tensioned and does “sound like a bass guitar”
- Now run the
Settings->Manual Belt Tuningwizard. Once it shows the frequency for the upper belt, try to tune the frequency 96 hz. Now tighten the belts equally until you see that the upper belt is “moving forward and backwards” in an optical way equally and slowly. Stay on the upper belt frequency but now tune the frequency until you see the lower belt is “moving forwards and backwards”. If everything is perfect, you should be around 91 - 93 hz. If you see that the upper belt frequency is much lower than the lower belt frequency, it means that the gantry isn’t square or you haven’t tensioned the belt equally. Restart with step “loosening the belt completely”. - For testing the skew and to optimize it, print this vernier skew test
Input shaper
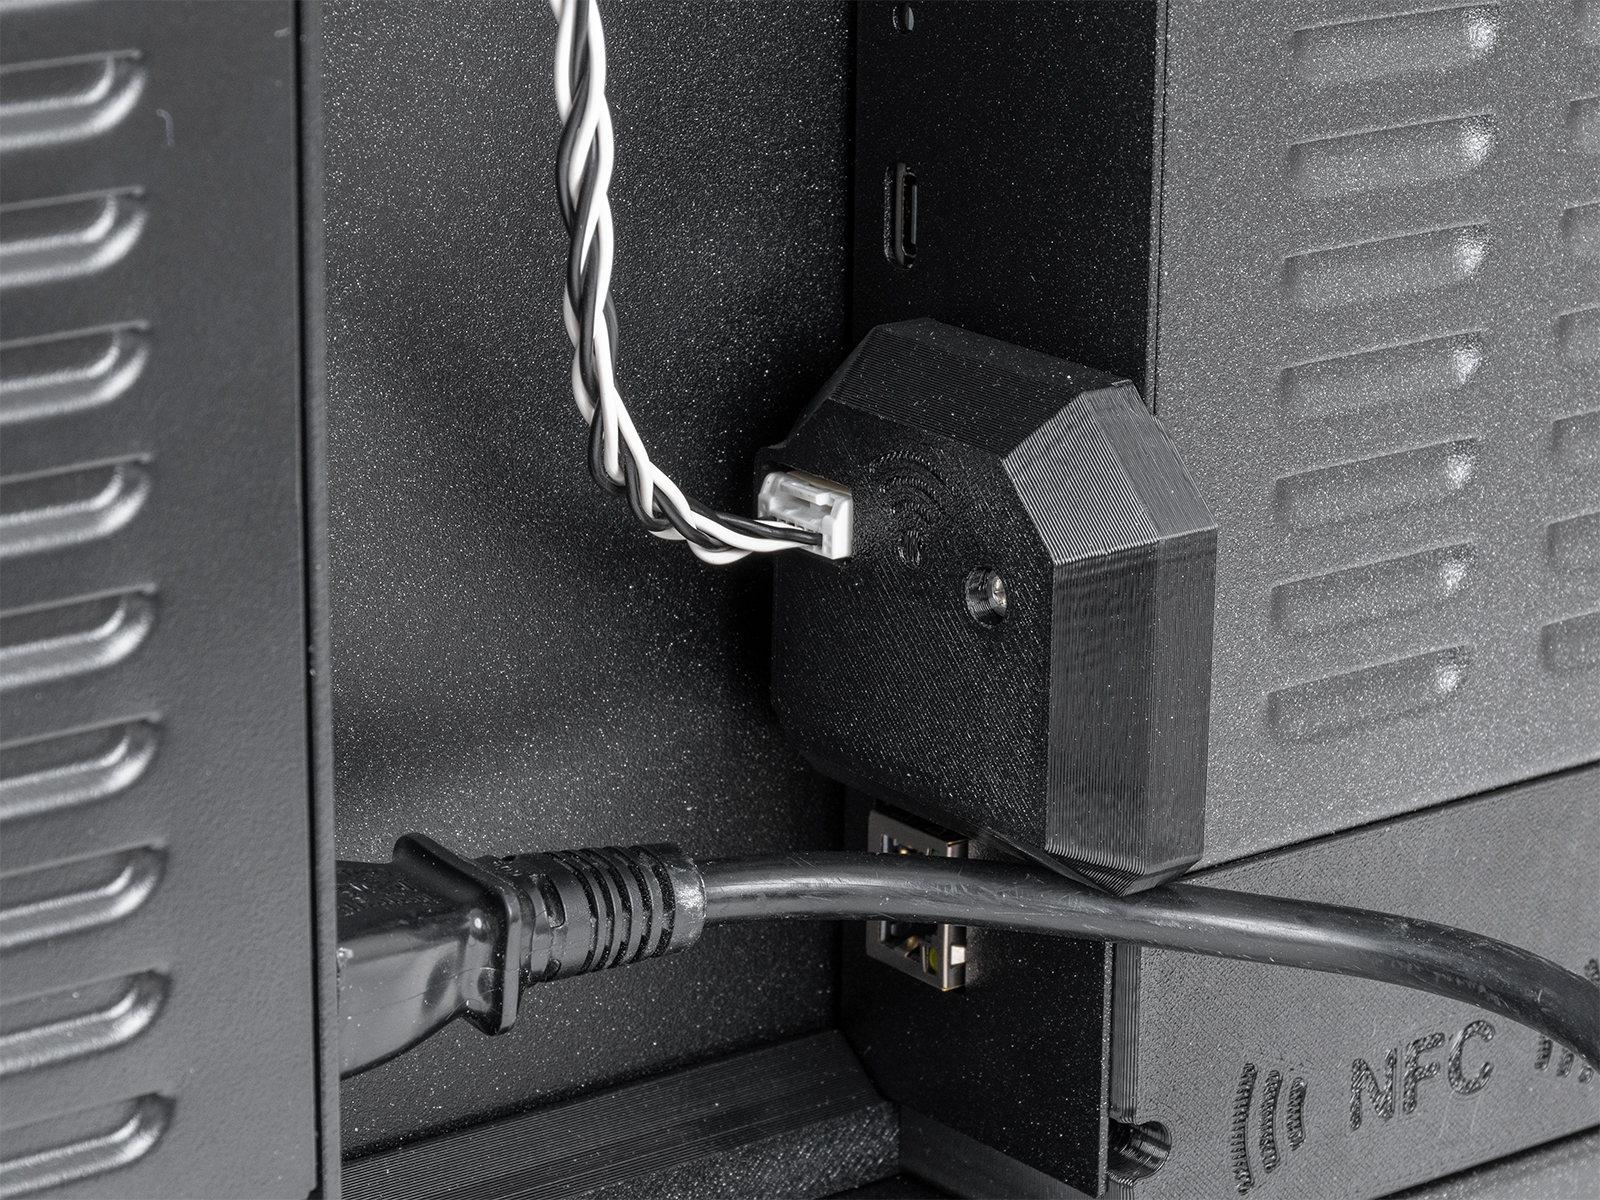
- Grab/Buy the prusa accelerometer
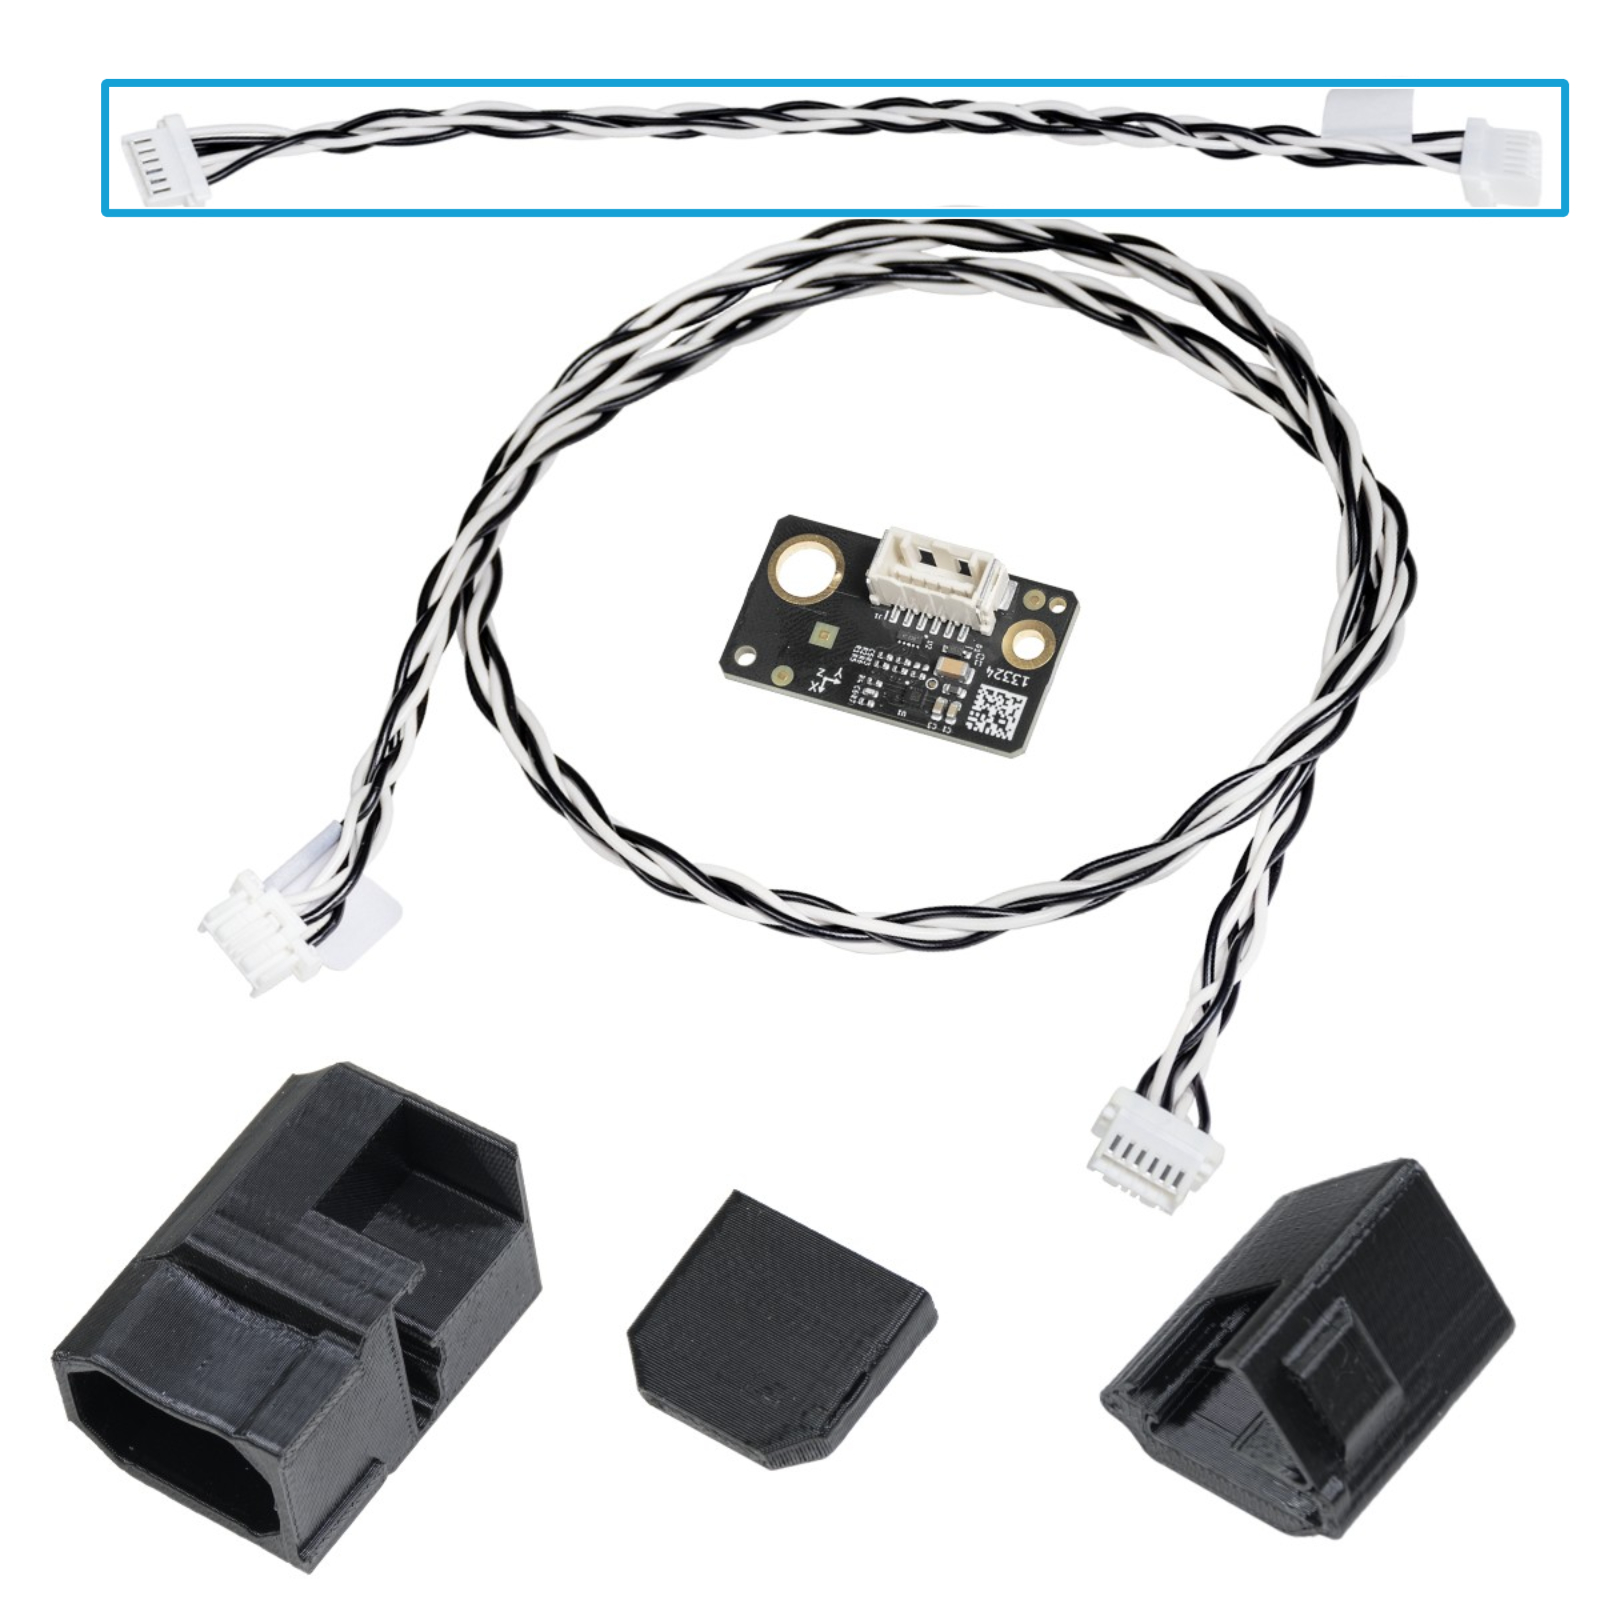
- Open the back plug and lay the accelerometer at the back side of the sheet in order to make sure it won’t be damaged by homing
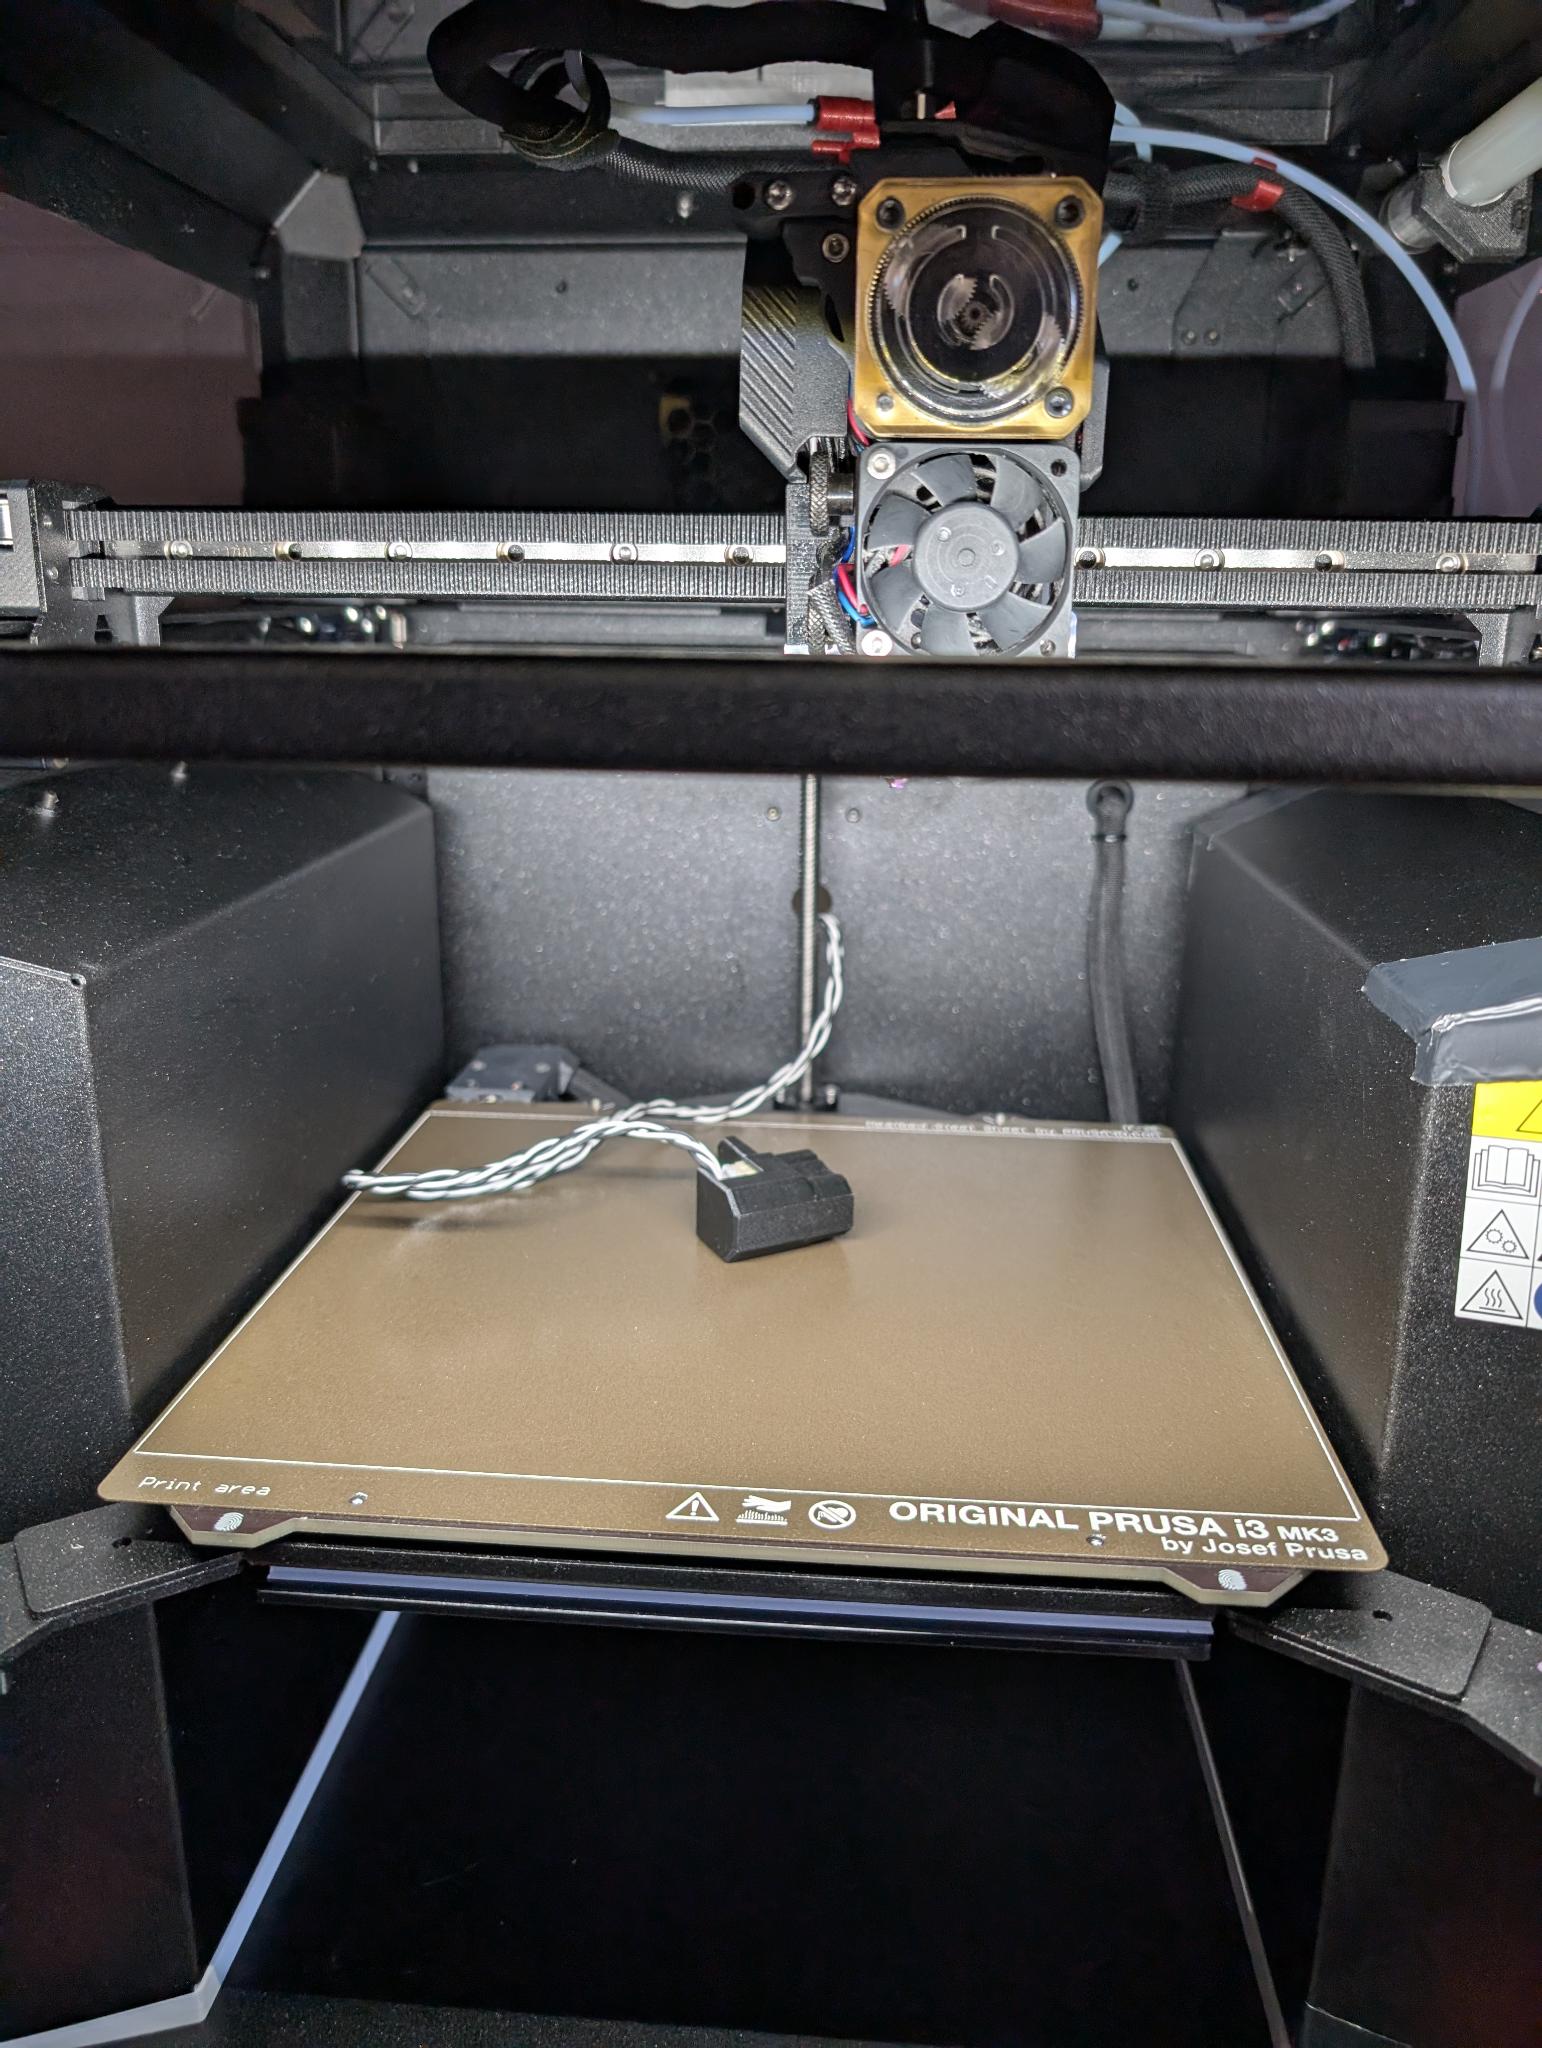
- Connect the accelerometer to the board
- Make sure the accelerometer isn’t attached yet to the heatblock
Settings->Input Shaper->Calibration, then pressContinue, the core one then will start homing- If you have a sock on the heatblock, remove it
- Now attach the accelerometer
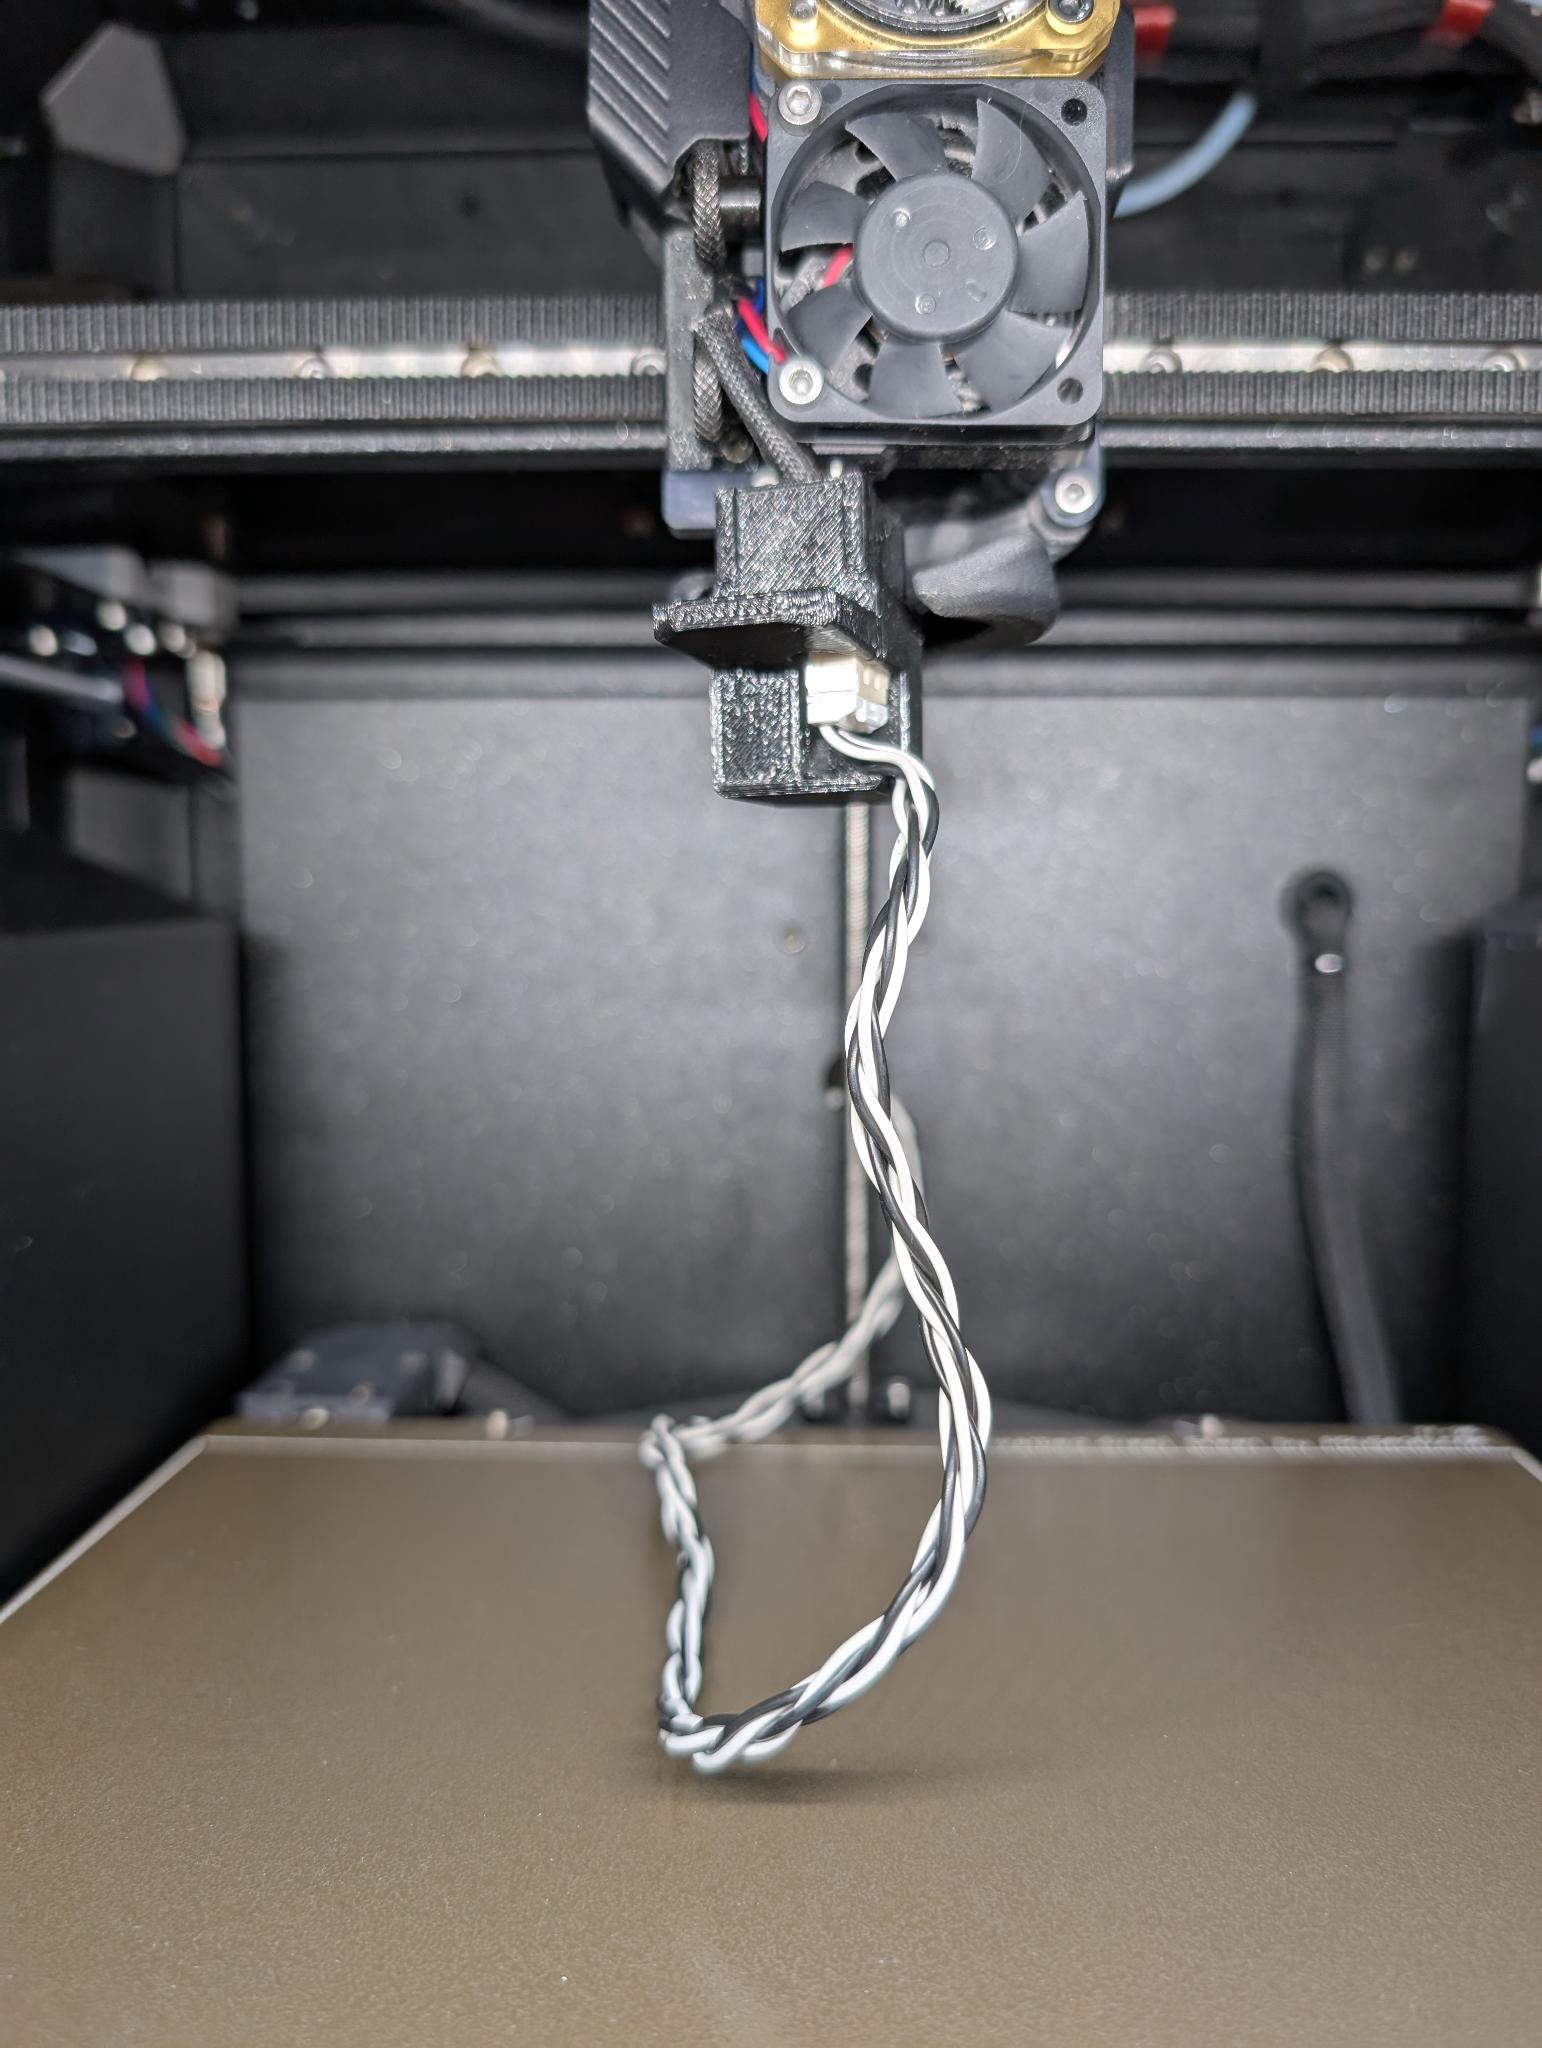
- Close the enclosure door and press
Continueon the screen asking to “firmly attach the accelerometer”. - Calibration does start with x and then with y input shaper calibration
- Once it asks to “Store and use computed values” press
Yesand you’re done
Phase stepping
- Let the accelerometer connected
- Go to
Return, then being in theSettingsmenu, selectPhase Stepping->Calibration, pressContinue - Once calibration is done, it should list “Motor X/Y vibration reduced by xx%”
- Press
OKand you’re done
Noise issues
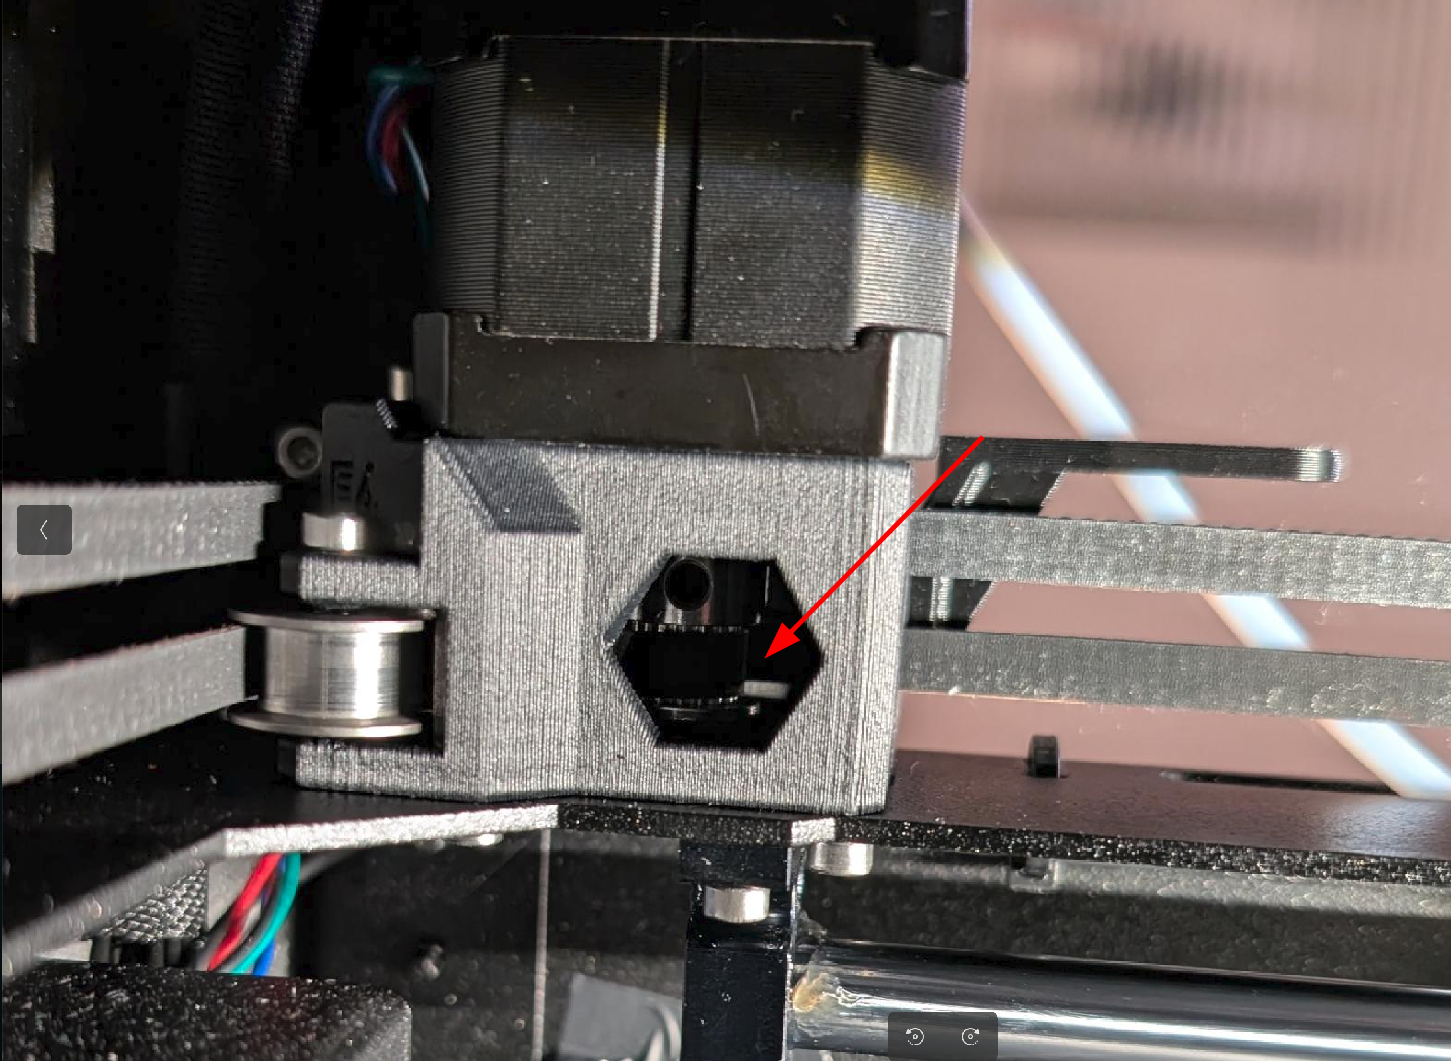
Belt ripple sounds or metal ripping sounds when moving the gantry fast back and forth
- Make sure that the belt is in the middle of the pulley gears, if not, move the gantry until you see
the pulley screw, loosen the pulley screw, place it gently up or down using a flat screwdriver in the right direction, then retighten the pulley and move the gantry
to make sure it is perfectly centered.
- Make sure that the rods are slightly lubricated using sythetic grease (I recommend: Superlube 21030)
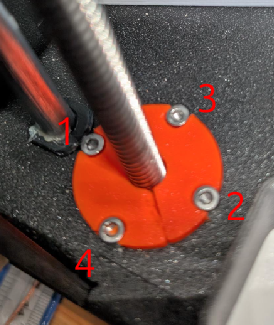
Noise when moving z-axis upwards/downwards
- Auto home
- Move the z-axis to the middle
Control->Move Axis->Move Zto a value like 100mm - Loosen the screws and slowly retighten them in a crossing pattern
Loudness on table
- Print the hula feet and the core one connectors
Loudness on high speed printing in the night
- Use the stealth profile
Settings->Stealth Modeto slow down fast movements
Belt tension not possible due to nut turning in tension idler
- Best print BEFORE this happens by replacing the tensioner pulley with this version
Printing issues
Residue at the nozzle when printing
- Residue on the nozzle when printing leading to print fails => In PrusaSlicer, set
Printers, General, Size and coordinates -> Z offsetto 0.1 mm - If needed, reduce the Filament extrusion multiplier in PrusaSlicer
Filaments, Filament -> Extrusion multiplierto a lower value, best print the calibration cube, see here
Issues at printing corners or at the edges / overhangs
- In PrusaSlicer, set
Print Settings, Speed, Dynamic overhang speed -> speed for 75% overlapto a lower value such as 60%
Issues with infill lines being broken
- In PrusaSlicer set
Print settings, Infill -> Fill patternto Aligned Rectilinear or Gyroid
Print doesn’t start if same project is modified and reprinted
- In PrusaSlicer
Print Settings, Output options -> Output filename formatadd_{timestamp}, for example{input_filename_base}_0.4n_{layer_height}mm_{printing_filament_types}_{printer_model}_{print_time}_{timestamp}.gcode
My Print is taking too long
- In PrusaSlicer enable the option
Print Settings, Infill, Reducing printing time -> Automatic infill combination
Issues with nozzle flow
- Check for debris in the nextruder, clean the nextruder gear using pressured air or best: disassemble the nextruder gear, clean, then reinsert
Issues with layer shift
- There is a known bug on Core one in case “Avoid Crossing Perimeters” is enabled in PrusaSlicer settings. Make sure it is turned off.
Pictures (c) Prusa3d.com and (c) B.Kerler
I feedback.
Let me know what you think of this article on twitter @viperbjk or leave a comment below!
Let me know what you think of this article on twitter @viperbjk or leave a comment below!
comments powered by Disqus